Creating an ePub Navigation TOC when you don’t have chapter headers to use
If you make your eBooks with Indesign, you’ll know the Table Of Contents tool is super handy, except for when your chapters don’t have headers.
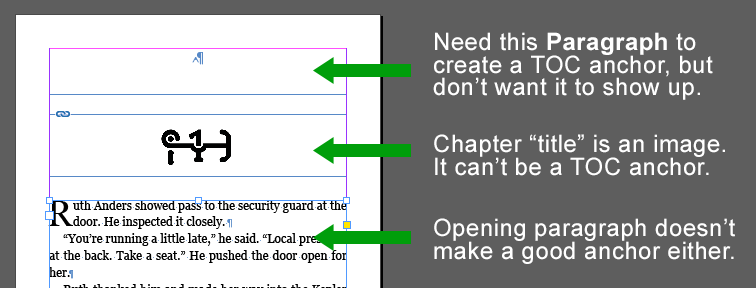
This might be the case if you want to include a rasterised chapter number using a fancy font, for example, to get around issues of unreliable font embedding. You can’t use the picture to populate the TOC, so you have to use a paragraph you didn’t actually want in the first place as a marker. Bummer.
Various solutions I’ve seen to date and why they don’t work:
- Put the header on an invisible layer – a great solution for print formatting, doesn’t work for reflowable ebook formatting – the navigation TOC does not populate at all.
- Put the header in the bleed – again doesn’t work for re-flowable ebook formatting because it will place it somewhere, probably not where you expected. Risky for print formatting because your bleed is there for a reason.
- Change the colour or tint on the header – is a brutal hack, because you cannot control how different devices might handle this.
- Give up on your pretty chapter titles – Of course, scrapping anything interesting in your book and using simple formatting throughout does work, but it is very limiting.
So what IS the solution?
My solution is to use an invisible character – a non breaking space – to create the anchors, and then get my hands dirty by directly editing the TOC code of the ePub.
How? First, follow the normal process for creating a TOC style. There are lots of free online tutorials that will walk you through this.
Create a text box where you want the chapter to start. Instead of entering the chapter number, enter a non breaking space (Ctrl+Alt+X).
Apply a paragraph style to this space. One that you don’t use elsewhere or create specifically for this purpose.
(Another Tip: You can also set this paragraph to “split document” under the export tags tab and it can double for your page break handling – neat!)
Now go to Layout > Table of Contents and select the paragraph style as the entries for the TOC. Check “Make Text Anchor in Source Paragraph”.
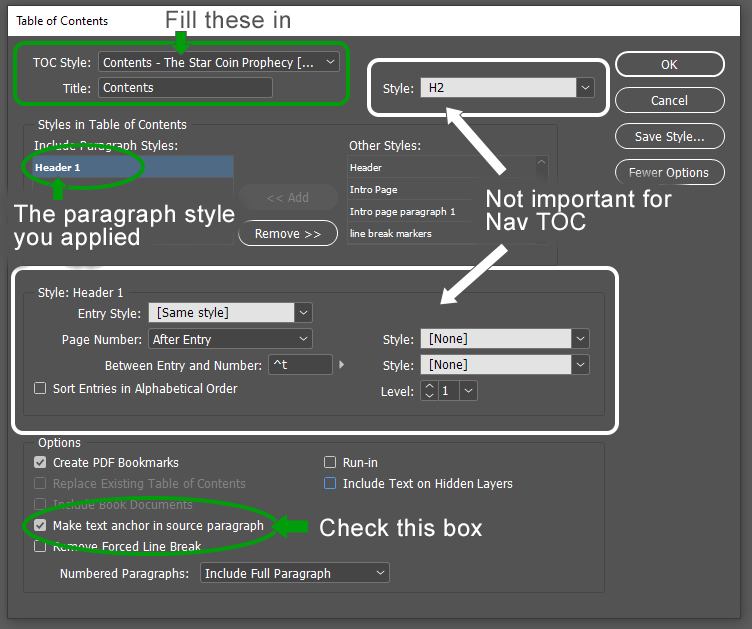
The other settings determine how a live text TOC inserted into your document will look. If you don’t want to put a TOC in the ePub, but you do want a navigation TOC, then these settings aren’t important.
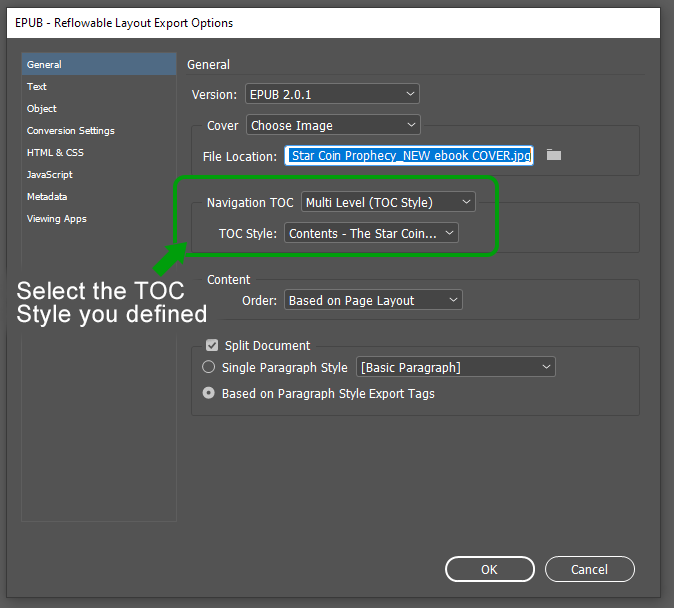
When you export to ePub, select your TOC style in the export options.
When you open your ePub to view it, there will be a navigation TOC but none of the links will have labels. It’ll just be a list of blank buttons. But, the navigation works, so we’re half-way there. We have a functional navigation TOC without having to add any visible headers we didn’t want.
Now to make it clearer for the readers. You’re going to have to go in and give the TOC labels.
(Note: You’ll want to make sure this is the last thing you do, because if you make changes to your InDesign file and re-export, you’ll have to do it all over again.)
To edit the TOC, you’ll have to open the toc.ncx file within the ePub. To access this without unzipping the ePub (because it’s hard to re-zip), you’ll need an ePub editor – I recommend Sigil.
Once you have installed and opened Sigil, use it to open the ePub you created with InDesign. Find the toc.ncx file in the browser on the left. It will open a page of code in the main viewer. If you’re not familiar with HTML or CSS you might be panicking right now, but don’t. It’s super simple.
Each entry on your TOC is governed by a single line of code which will look something like this:

It defines the “navPoint” which will be referenced in the main files of the eBook so the link knows where to go. It also defines the “text” to go in the TOC. At the moment, your text is just a non-breaking space. You’ll see it between the “text” and “/text” tags.
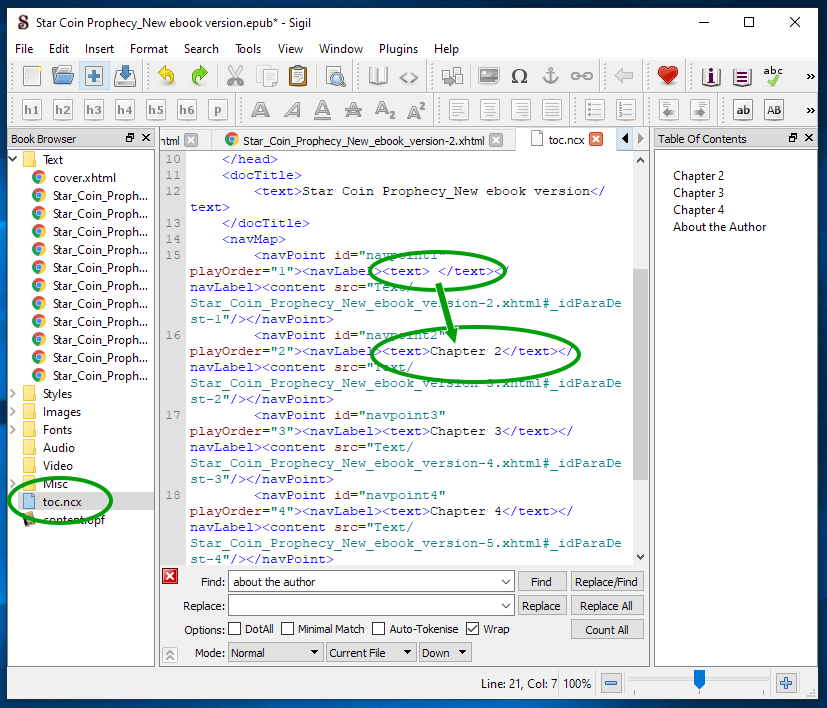
Change this space to the label you want, e.g. Chapter 1. And do it for each of the navPoints. (Do not edit the navpoint ID or anything else in the line of code. Your changes must go between the opening and closing “text” tags). Save the file.
Now, when you load this ePub up in the reader, your TOC will have the labels you want, they’ll point to your invisible non-breaking spaces in the book, and there’s no messy formatting. Sorted.
THAAAAANK YOOUUUUU!!!!
I’ve been trying to figure this out for a while now!! I tried other things that DIDN’T work. I used your method and it worked!!
I’m very GREATFUL!!!!
So glad it helped 🙂
That post is a little out of date now as Sigil now have a very handy TOC editor button on the toolbar that makes the second step much easier!